| Home | Paint Shop Pro | Zoee Tutorials |
|
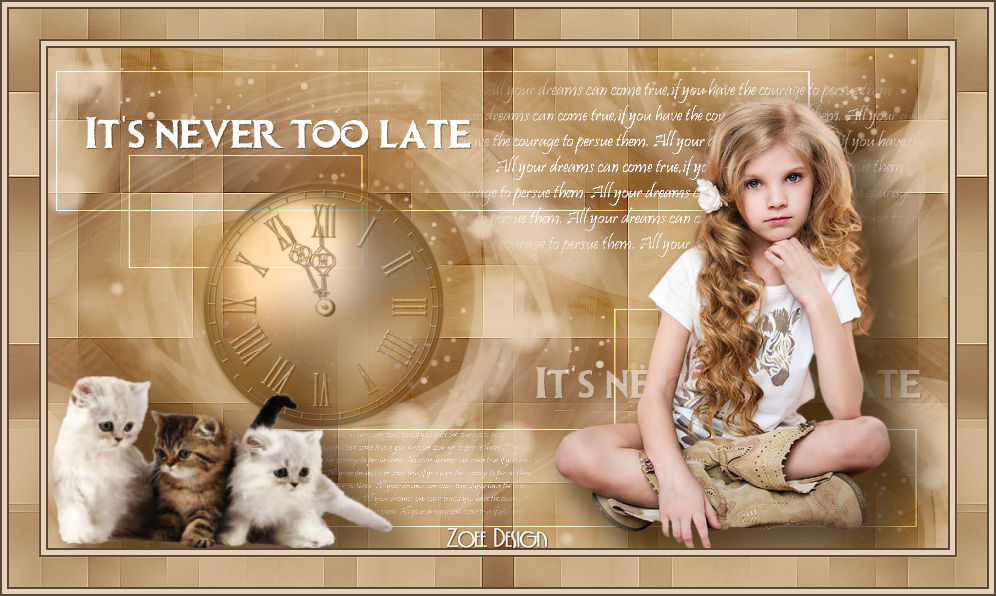
This tutorial is
made with PSP X7 ***** Materials here:
Thank you for letting me use your beautiful creations in my tutorials
Tubes from Animabelle & CiBi ***** Plugins: Medhi – Sorting
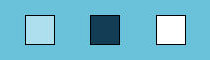
Tiles ***** Colors:
*****
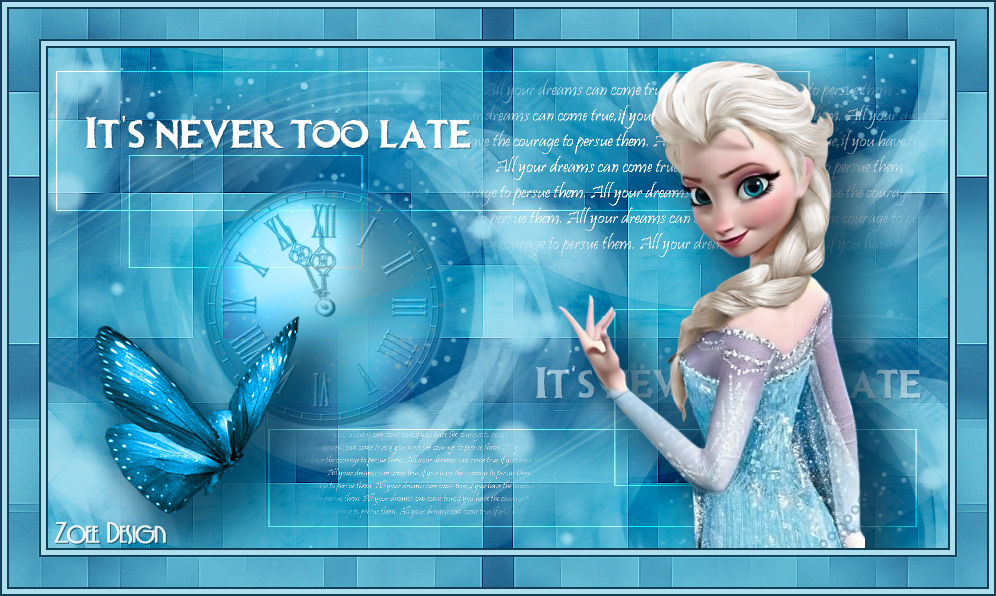
1. Open a new image 900*500 transparent
Set the Foreground color to
#aedfef
2. Change the
foreground color to gradient foreground-background and Flood Fill
your image with the gradient
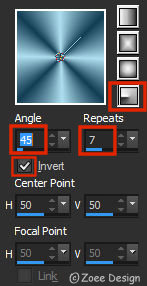
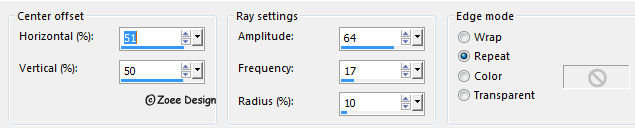
3. Effects – Distortion - Spiky Halo
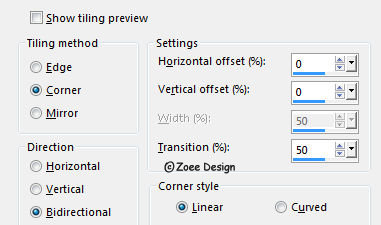
Effects – Image Effects - Seamless Tiling
Adjust -Blur - Gaussian Blur – Change the number to 15
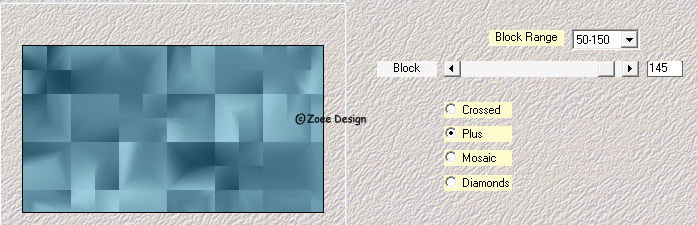
4. Effects – Plugins - Medhi – Sorting Tiles
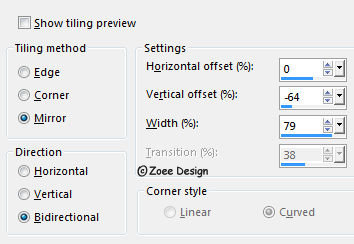
Effects – Image Effects - Seamless Tiling
5. Layers - Duplicate Image - Mirror - Mirror Horizontal (Image - Mirror in older versions of PSP) Layers - Properties – Change Blend Mode to Overlay Layers – Merge – Merge Visible Effects – Edge Effects – Enhance
6. Layers - New Raster Layer (Raster 1)
Change the gradient to color #aedfef
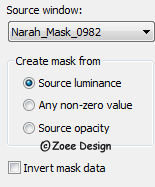
Open the mask 'Narah_Mask_0982' and minimize it
Layers - New mask Layer – From Image
Layers - Merge - Merge Group
7. Layers - Duplicate Layers - Merge - Merge down Effects – Image Effects – Seamless Tiling
8. Layers – New Raster Layer (Raster 1)
Flood Fill with the background color
Open the mask 'Narah_Mask_0999' and minimize it
Layers - New Mask Layer – From Image Layers - Merge - Merge Group Effects – Image Effects – Seamless Tiling same settings as before
9. Layers – Duplicate Image - Mirror - Mirror Horizontal (Image - Mirror in older versions of PSP) Layers – Merge – Merge Down Layers - Properties – Change Blend mode to Burn and Opacity to 50
10. Layers – New Raster Layer (Raster 1)
Change the Foreground color to
#ffffff
Flood Fill with the Foreground color Open the mask 'ildiko_create_0010free_mask_2' and minimize it
Layers - New Mask Layer – From Image Layers - Merge - Merge Group Layers - Properties – Change Blend mode to Overlay
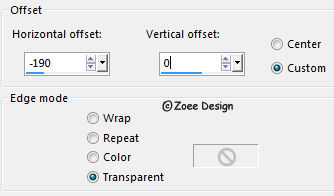
11. Open the tube’ Horloge_minuit_by_CibiBijoux’ Edit – Copy On your image, Edit – Paste As New Layer (Raster 1) Image - Resize 50%, Uncheck All Layers Use Selection Tool or Eraser Tool to delete the logo from the tube Effects – Image Effects – Offset
Layers - Properties – Change Blend mode to Luminance Legacy and Opacity to 80
12. Open the tube ‘Zoee_NeverTooLate_Text1’ Edit – Copy On your image, Edit – Paste As New Layer (Raster 2) Effects – Image Effects – Offset, same settings as before, but change the numbers to 190 / 130
13. Layers – Duplicate Image - Resize 50%, Uncheck All Layers Effects – Image Effects – Offset, same settings as before, but change the numbers to -170 / -240 Adjust – Sharpness - Sharpen
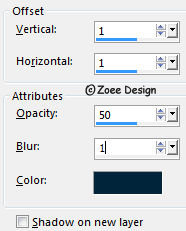
14. Open the tube ‘Zoee_NeverTooLate_Text2’ Edit – Copy On your image, Edit – Paste As New Layer (Raster 3) Effects – Image Effects – Offset, same settings as before, but change the numbers to -220 / 165, Effects – 3D Effects – Drop Shadow
Color - #00243a
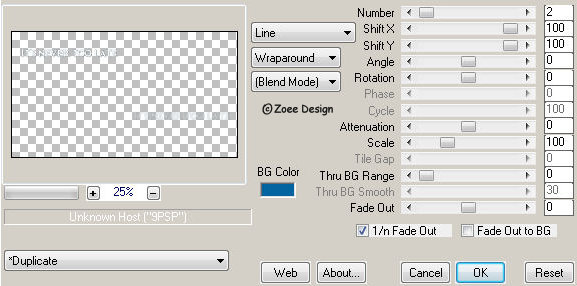
15. Effects – Plugins – MuRa’s Meister - Copies
16. Open the tube ’ 2_disney_tube_exclusif_animabelle’ Edit – Copy on your image, Edit – Paste As New Layer (Raster 4) Image – Resize 80%, Uncheck All Layers Use Selection Tool or Eraser Tool to delete the logo from the tube Use Move Tool and move the tube to the right and up like in my image Effects – 3D Effects – Drop Shadow
Color - #00243a Repeat Drop Shadow, same settings
17. Open the tube ‘165_animabelle_tubes_animaux’ Edit – Copy on your image, Edit – Paste As New Layer (Raster 5) Image – Resize 80%, Uncheck All Layers Use Selection Tool or Eraser Tool to delete the logo from the tube Adjust – Hue and Saturation - Colorize
Use Move Tool to move the tube into the lower left corner like in my image Effects – 3D Effects – Drop Shadow, same settings as before, but change Opacity to 50 Repeat Drop Shadow, same settings
18. Activate the buttom Layer (Merged) Edit - Copy
19. Image – Add Borders – Check
Symmetric - 2 pixel – Color #133d54
Image – Add Borders – Check Symmetric
- 5 pixel – Color #aedfef
Image – Add Borders – Check Symmetric
- 2 pixel – Color #133d54
Image – Add Borders – Check Symmetric
- 30 pixel – Color #aedfef
20. Magic wand Tool, Feather og Tolerance must be 0 Select the last border Edit – Paste Into Selection Adjust Sharpness - Sharpen Selections - Select None
21. Image – Add Borders – Check
Symmetric - 2 pixel – Color #133d54
Image – Add Borders – Check Symmetric
- 5 pixel – Color #aedfef
Image – Add Borders – Check Symmetric
- 2 pixel – Color #133d54
22. Layers – Merge – Merge Visible
Add your name or watermark Resize if you like Save as JPG
*****
You can contact me here Or you can share
your version on my Facebook page
Other versions here *****
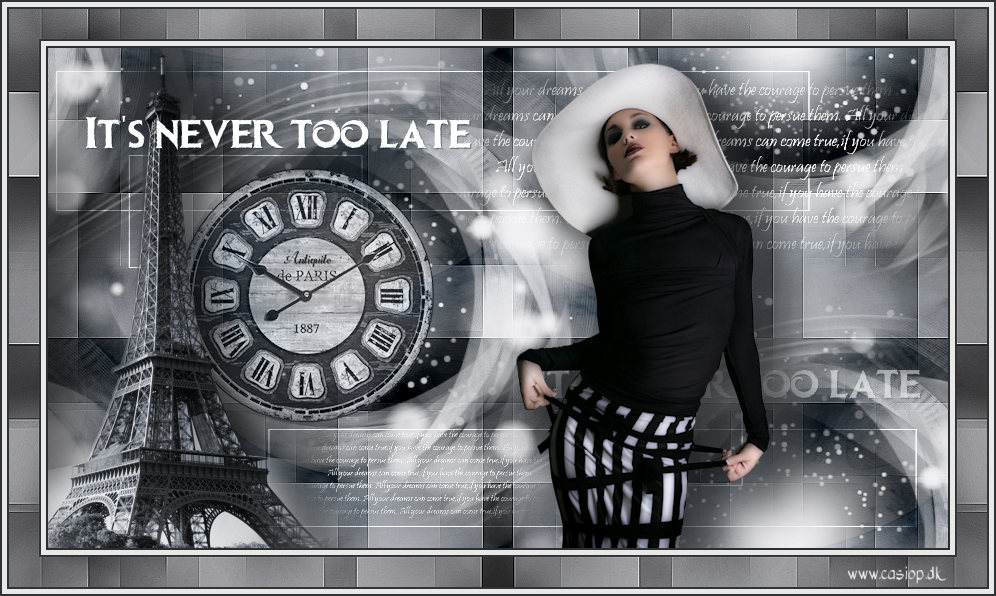
My other version with tubes from Lecture33
***** Thank you Casiop for testing my tutorial Casiops version
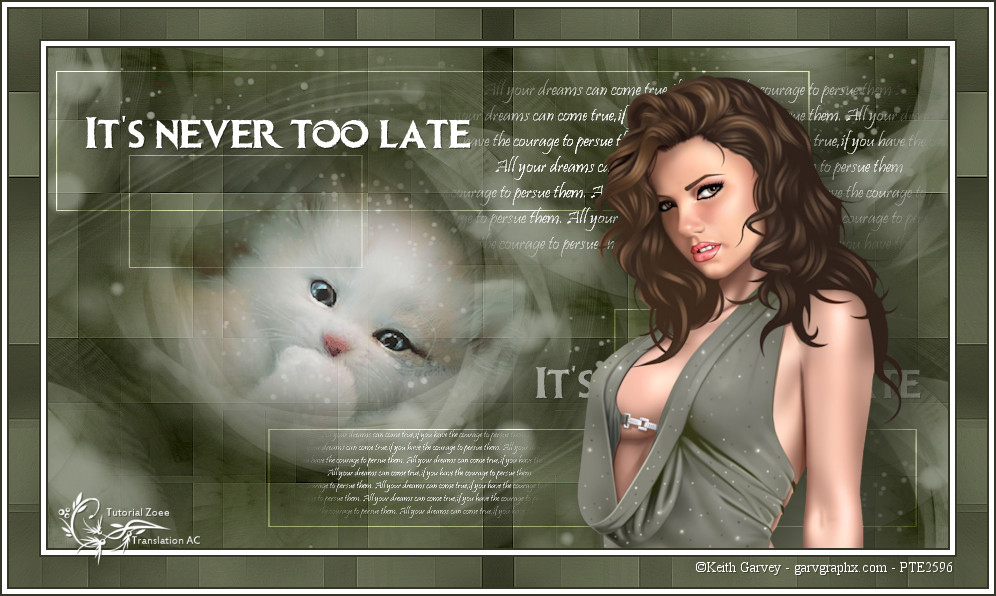
***** Thank you Animabelle for translating my tutorial to french Animabelles version
***** Thank you Angela for translating my tutorial to Dutch Angelas version
***** © Zoee-Design
|
||